Woo! Haven’t been blogging much since most of my recent projects have required me to keep quiet until they are done.. it sucks not to be able to share a lot of what’s going on 🙁
Anyway, with more to come I thought I’d share a recent project that was completed within a few hours of tinkering and hacking.
But first a quick back story, I had the great pleasure to be running the Hardware Hacking Village this year at Layerone 2012 along side with Krs, Charliex, and Mmca of Nullspace Labs. Layerone is a security conference that covers everything from computer security to lockpicking and hardware hacking. Each year since last year, Layerone has had electronics badges and has provided a working space for attendees to build and hack their badges. What happens is we pretty much pack up most of our equipment at the Nullspace Labs Hackerspace in Downtown LA and bring it down to the conference. This year we had 12 metcal solder stations and 10 microscopes along with many tools such as heat guns and tweezers to help you build and hack your badge. Charliex, Krs, and Mmca spent the last 2 week designing, revising, ordering, testing, and building them (along with some help of a few NSL members, fiances, and myself). With only 4 hours and 45 minutes left to spare, we all arrived at the Layerone hotel at 4:15am.. good times.
This years badge was a bullet proof pcb that was half an Arduino and half an RC car controller (with traces running between them allowing you to control it with the Arduino). When you bought the kit to populate the boards you also received an RC car which you could interface with your badge. I felt that human control was fun, but thought it would be awesome if my badge could just follow me and avoid obstacles so I wouldn’t have to carry it around my neck 😛
I, knowing ahead of time what the badge would be, decided to order a few parts a week in advance so when I had some time I could build and hack my own badge. I should note that there was a badge hacking competition held at the conference, and very fairly, I was disqualified due to prior knowledge 😉 no problem though, I have an awesome car that drives itself! I should note that you should check out Charliex’s blog which has a much more in depth write up about the badge hacking competition. Mad props to Jason who made a morse code keyer and Funsized who made an EL-wire/IMU based badge.
Back to the car, I purchased the following:
Sparkfun Prototyping Shield: ($14) http://www.sparkfun.com/products/7914
Parallax Ultrasonic Range Sensor PING))): ($30) http://www.parallax.com/….
Servo Motor Hitec HS-81: ($16) http://www.xheli.com/hrc31081s.html?gclid=CLvBwq6hpLACFY4FRQods2JqXg
and few wires..
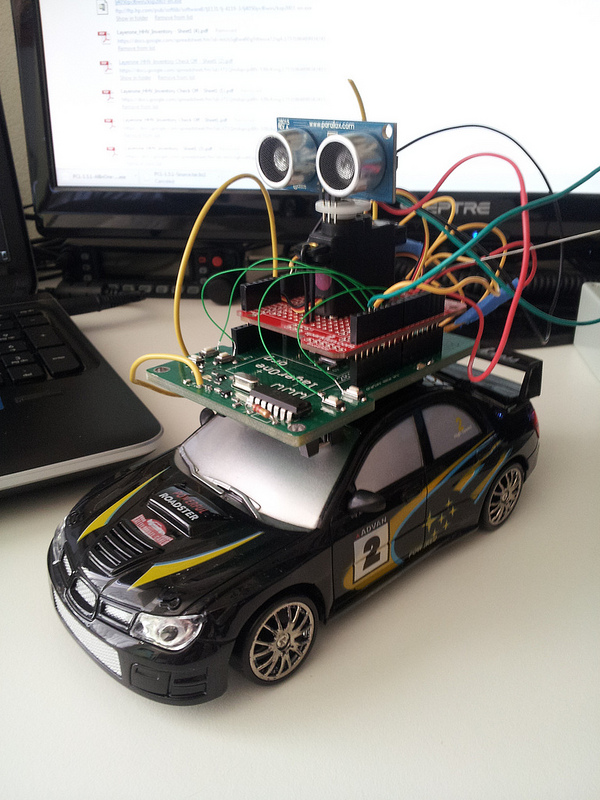
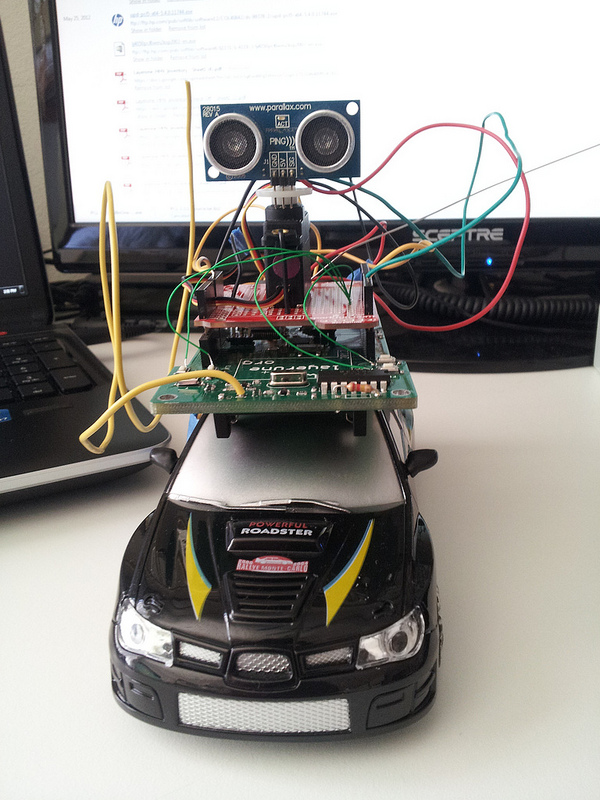
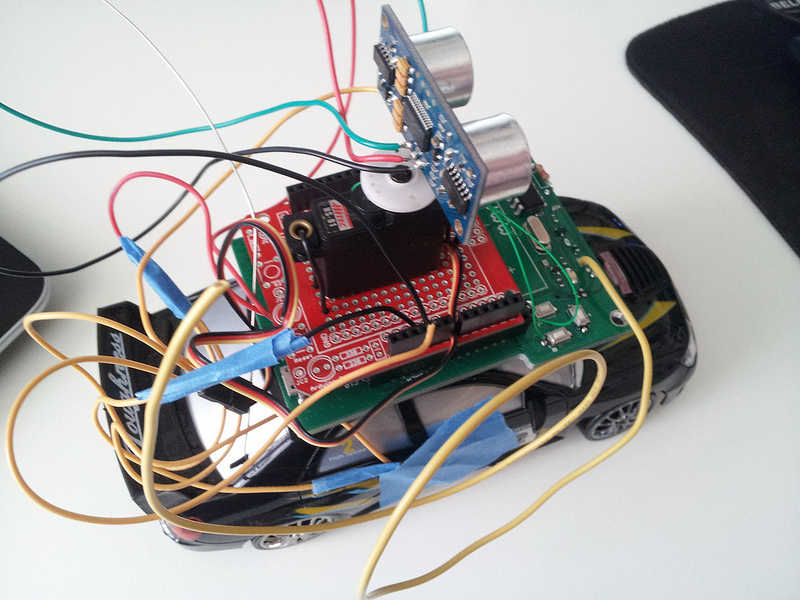
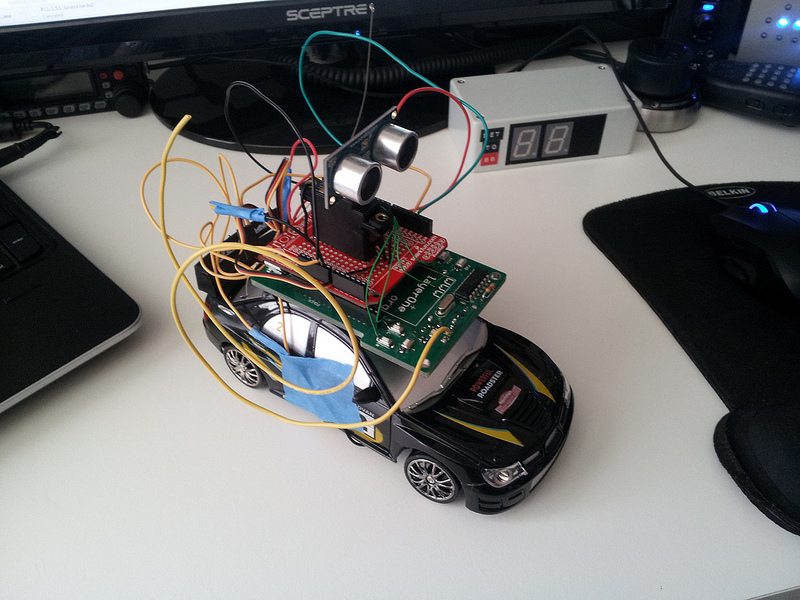
What I decided to make was an autonomous car that would use the badge as a base/brain, the car as the controls, and the ultrasonic sensor on top of a servo for finding and avoiding obstacles.
I ended up naming it “Stanley Jr” after the notorious “Stanley” DARPA Grand Challenge car built by Stanford’s team. I will take this moment to note that if you are a GoogleX Labs employer (or know of one) and are looking for someone madly obsessed with self-driving cars to work on your team, I will gladly send you my resume 😀 I build robots too!
So between helping others build their badges for the con, I was able to piece together the hardware in under an hour. After some troubleshooting I had a non-continuous hour of coding. The results aren’t great by a long shot when it comes to autonomous vehicles, but I do plan to improve the code and make Stanley Jr smarter. As of right now, the ultrasonic pans in three positions, left 45deg, center 90deg, and right 135deg. Since the steering is practically trianary (left, center, right) I figured it’d be best to sweep the three directions it had available, move a small step, and then repeat. After solving a few bugs and fixing other peoples badges I had some working code. The goal the vehicle is given is to drive in the direction in which it sees the furthest distance. If the distances on all three options is too small, it will not make any moves to avoid accidents. Improved code that is currently in the works has a mode where it backs up in the direction it came in and then picks the alternative direction from that previous move.
The proper way to go about this control system would be to have a smooth sweeping of the ultrasonic sensors to obtain a more accurate model of the world. The car would then be given the goal of “drive forward and don’t hit anything”. Then rather than “sweep, stop, think, act, repeat”, it would be constantly moving at a regulated speed based on how far it can see. Once objects to its center get close it will pick the furthest distance out and go in that direction with the intention to return to wheels center. So lots to come 🙂
Stanley Jr is pretty stupid at this point, but not bad for about 2 hours of work. I plan to drastically improve the code and eventually move to a wheelchair base system that can drive around a beer keg delivering beer to bystanders while using a Microsoft Kinect to both recognize people and avoid objects.
Here’s a video and few pictures of the car:
Be warned, I wrote this code in a rush, it’s no where near complete or smart. Here’s the code:
// Layerone 2012 Autonomous Car Code
// By: Arko
#include <Servo.h>
Servo myservo;
int pos = 0;
const int pingPin = 2;
long world[4];
int world_count = 0;
void setup()
{
Serial.begin(9600);
myservo.attach(3);
pinMode(13,OUTPUT);
pinMode(9, OUTPUT); // BACK
pinMode(8, OUTPUT); // FWD
pinMode(7, OUTPUT); // RIGHT
pinMode(6, OUTPUT); // LEFT
}
void loop()
{
digitalWrite(6,HIGH);
digitalWrite(7,HIGH);
digitalWrite(8,HIGH);
digitalWrite(9,HIGH);
digitalWrite(13,HIGH);
// Obtain Environmental Model
world_count = 0;
delay(500);
for(pos = 45; pos < 180; pos += 45)
{
myservo.write(pos);
long duration, inches, cm;
delay(500);
pinMode(pingPin, OUTPUT);
digitalWrite(pingPin, LOW);
delayMicroseconds(2);
digitalWrite(pingPin, HIGH);
delayMicroseconds(5);
digitalWrite(pingPin, LOW);
pinMode(pingPin, INPUT);
duration = pulseIn(pingPin, HIGH);
// convert the time into a distance
inches = microsecondsToInches(duration);
cm = microsecondsToCentimeters(duration);
world[world_count] = cm;
world_count++;
Serial.print(inches);
Serial.print(“in, “);
Serial.print(cm);
Serial.print(“cm”);
Serial.println();
delay(1000);
}
Serial.print(“World: “);
for(int c=0; c<3; c++)
{
Serial.print(world[c]);
Serial.print(“,”);
}
digitalWrite(13,LOW);
delay(100);
// Control
// Direction 0 – LEFT
// 1 – CENTER
// 2 – RIGHT
if((world[0] > world[1]) && (world[0] > world[2]) && (world[0] > 30)) // Go Left
{
digitalWrite(6, LOW);
digitalWrite(7, HIGH);
digitalWrite(8, LOW);
Serial.println(“LEFT”);
}
else if((world[0] < world[2]) && (world[2] > world[1]) && (world[2] > 30)) // Go Right
{
digitalWrite(6, HIGH);
digitalWrite(7, LOW);
digitalWrite(8, LOW);
Serial.println(“RIGHT”);
}
else if(world[1] > 30) // Go Center
{
digitalWrite(6, HIGH);
digitalWrite(7, HIGH);
digitalWrite(8, LOW);
Serial.println(“CENTER”);
}
delay(500);
}
long microsecondsToInches(long microseconds)
{
return microseconds / 74 / 2;
}
long microsecondsToCentimeters(long microseconds)
{
return microseconds / 29 / 2;
}


One comment
[…] up, we have the autonomous RC car built by [Arko]. He calls it Stanley Jr. as an homage to the Stanford DARPA Grand Challenge vehicle. It […]